Showing posts with label paper craft. Show all posts

Thursday, March 23, 2017

Sending Smiles

I made my first batch of cards for Send A Smile 4 Kids for 2017. They are a card drive collection group that gives cards to hospitalized cards to children or for children to write to their love ones. 


I started sending my cards to them last year and hope to continue to do for the many years to come. They take any type of cards: any holidays, Mother's/Father's day, Easter, etc. Please check them out! 

I was able to use some of my scrapbooking paper. It felt so productive and very resourceful! What a good way to use up some scraps. They are very simple cards. I hope they bring smiles to their receivers.


Sentiments are from various stamp companies such as The Stamps of Life and Papertrey Ink. 

Challenges entered:


Thursday, November 24, 2016

Happy Thanksgiving!!! And look: Crafty Sales!!!

Ok, I know I've been MIA for a while from my blog. But I have great news for all my crafty friends out there! It's Thanksgiving, which means shopping and sales this weekend!

1. MFT Sale:
I saw the email and flipped! 30% off!!! MFT is, by far, one of my favorite stamp companies out there. Totally going to check to this out tonight!

2. Simon Says Stamp Sale:
Again, I saw this in my email and flipped! 30% off!!! Definitely browsing and shopping this weekend!

3. Lil' Inker Designs Sale - Starts Friday:
Smaller stamp company but have lots of great stuff! I have several stamps and die from them. Very clever and punny products. The best thing about this sale is that no code is needed! 

4.  Concord & 9th Sale:
This is a newer stamp company with great products. I only have two stamp sets from them and I like them a lot. Definitely worth checking out. 

Happy shopping crafters!


Wednesday, October 5, 2016

Detashing: Halloween cards

It's October. This means it's officially fall/pumpkin/apple cider/Halloween time! This is my favorite season: perfect hoodie weather and I can still go outside without getting too hot or cold. Plus, who doesn't love apple-picking-pumpkin-spiced season?

So I went through my scrapbooking supplies and found a bunch of Halloween stuff. I decided to make them all into cards (so that I can clear out some space for other craft things). There's a glimpse of my first batch:


By far, my favorite of this batch is this one:


It's simple and clean. I love the sparkly bat and the color combo! I think it's great for any age, kids or adults.

Challenges entered:
SSS Monday: Halloween
SSS Wednesday: Halloween Inspiration

Saturday, April 30, 2016

Wonderful Sip

Since I had my Misti out already (from the last post), why not make a whole bunch of other things!

I wanted to use my coffee stamps to make something summer-like and colorful. I combined three different stamp sets to make this:


Of course I had to make matching envelopes too.  


Challenge entered:
Simon Says: Anything Goes

Succulent Revival

My older sister and her husband came home last week for our younger sister's wedding. She caught me red-handed as the succulent neglecter. I had no idea how my plants were all dying... guess I haven't been a very good gardener lately. Nonetheless, with her help. my succulents are back in recovery and good shape! I can't wait for my baby plants to grow into a bigger size!

With that, I decided to make a succulent card:


I also kinda went on a Misti-craze and made a whole set of card! I used several different shades of greens/mint. Then, I double stamped smaller plant with some light purple ink. 


I really like the layering of the inks. I purposely didn't blend the ink and hoping for an effect like this. I'm so happy with the results. 

Challenge entered:

Sunday, February 14, 2016

Last PTI For now

Yup, another PTI challenger post! (crazy, I know!)
  

Here's my take on the paper crafting alphabet challenge:


This one took some time but FINALLY! It's done! There's a little bit of everything here: die cutting, ombre inking, emboss resist, etc. This was fun but so much brain work before putting it all together. 

Valentine + PTI

Happy Valentine's Day! Despite this how much I don't like how this day has became a Hallmark holiday, I still wish my boyfriend was in town. He did, however, send me a parcel last week for this day. It came in the mail on Wednesday and I told myself I had to wait until today to open it. (It felt a little but like waiting to open your presents on Christmas day.) He sent me some chocolates (mint! my favorite!), origami flowers (handmade by him), and a card. So sweet!! Thank you my dear!!!

So spending the day at home, I decided to finally upload some PTI challenges. Yup, another PTI entry post! In this post, I'm several challenges within one blog post (crazy, I know!). I've been creating just no time posting until now. 
  

Here's my Saturday Snail Mail challenge for this month's release:


The "thankful" is made of multiple layers of the die cut and the top layer is a gold foil cardstock. It's super shinny! It was kind of hard to take a picture of it without glare. I'm sending this one off to the PTI warehouse workers!


You can't really see it in the picture, but there are several mini gems on the card. The "Thanks" is also made of multiple layers of the die cut, giving the card some extra dimension. 


Oh man, I was so surprise how little time 5mins really was! I kept going back and forth between stamp sets and colors!!! Before I knew it, time was up and needed to start crafting! This was a hard challenge!

And last and not least, Day 2: Dress Up Inspiration:


I thought this was so much fun! The fabric inspired is the my summer teal dress (it's the fabric behind the card in the picture). Unfortunately, the closest teal PTI I could find was tropical teal; hawaiian shores was too light in color. The "thanks" is also made of multiple layers of die cuts. (I feel like that may be my "go to technique" for the time being... I think I did something similar on all my recent cards!) I put glossy accents all over the "thanks" to give it some 3D detailing. Lastly, I heat embossed "for all you do" in white. 

Oh man, that was a lot of cards!


Saturday, February 13, 2016

PTI: Color Recipe

As I've mentioned in the past posts, PTI is having their anniversary release this week and they're having lots of fun challenges. I'm trying to keep up with all of them. And here's one from day 1: Color Recipe Inspiration. I chose this recipe card:


I wanted to stick with four colors that were kind of neutral. Here's what I've came up with:


I'm thinking of making more of these with different color recipes and send the cards to CFHK.


CFHK collects handmade cards for kids that have chronic illnesses. "Doctors provide medicine and we provide hope, joy & magic." I hope this encourages you to get involve and send your cards in as well. Happy crafting!

Thursday, February 4, 2016

"Surprise!" - MFT

I'm so happy!!! I just saw Susan's (from MFT) comment on my previous post about the Color Challenge:

It's not quite being "I've been spotted" or "Spotlight" by SSS, but I'm just so excited to have been noticed by one of my favorite stamp companies!

feeling: HAPPY~

Ashley and I have a craft show coming up this weekend. It's the first show of 2016. Looking forward to it! I'll updated more photos and Etsy stuff soon!

Wednesday, January 13, 2016

Updating everywhere

As I mentioned in my previous post, I got a new planner for 2016. I've been using it and love it! I'm ordering the binder from PTI this week, along with any of their new releases that I like. Sad to say, nothing really peaked my interest right now. That's ok, my wallet will be happy.

I've also took the time to update my craft room! I finally put all the Christmas crafty tools away. I've also bought new cubes to store my 12x12 scrapbook paper. Thank goodness I did that - the room looks sooooo much better without paper everywhere!

Additionally, I've went through my inventory and put ALL Christmas away! I'm so proud of myself for putting the holidays back into its neat space. Now that the holiday is put away, I was able to go through and dig out my creations for the Spring/Summer craft shows.

Lastly (man, I've been so productive!), I'm slowly updating my Etsy store. Please visit! Last summer (wow, that seems so long ago...), I posted some shaker pocket cards for ProjectLife and people really liked them. Got lots of complements! So, I decided to do a line of shaker products. Here are the firsts few:


I hope to add more through out the week! Thanks for stopping by!

Monday, November 16, 2015

Almost Advent

Wow, this past month has gone by way too fast! I've been busy with craft shows on weekends and school stuff during the week. There's no time to do anything else! (or so it seems...)

Being at craft shows and seeing other crafters doing holiday stuff has really inspired me to make an advent calendar. I've never used one before, let alone make one! Nonetheless, I thought this would be a good project on the side. And TA-DA:


 It's a 6"x6" cube; made with 24 matchboxes. Each drawer slide out for each day before Christmas. And, for Christmas day, there is an extra big box on the top for more goodies on that very day! Here's the "back" side:


Technically, there is no "front" or "back." This calendar will need to be rotated as the days go by. Here's what it looks like with the drawers pulled out and the top opened. Each matchbox is the same size; they are all a little over 3" deep.

If I'm up for it, maybe I'll make another one to sell at the craft show! :)

Tuesday, October 27, 2015

First show of the season!

I've been MIA due to teaching and prepping for my first show of the season.  The show was small and local, but I'm was so nervous yet excited. Plus, the weather was not helping. The event was suppose to be outdoors, but it was raining and pouring at the beginning. I didn't know what to expect, especially it's so early in the season. Here's my set up:


My booth was against the wall (not ideal, but oh well). One side was all card stuff and the other are various paper crafts. 


The event turned out well. Better than I had hoped! Can't wait for the next show in a few weeks! I'm intending to post more of my crafts and shows in the near future. 

Saturday, October 3, 2015

Spotlight Surprise!

Happy World Card Making Day! And what a super pleasant surprise; I'm featured in the recent Simon Says Stamp's Spotlight for my previous blog post!

As for this week, the set of notecards I made below is entered into their Wednesday Challenge: Anything Goes and their main blog: World Card Making Day.

I stamped, die cut, and colored all these little cute foxes a while ago. It's time for me to put them to good use. I decided to make sets of notecards. They turned out so cute! I can't wait to use them and send them to people.


The weather is kinda gloomy here in Michigan, so my room is very dark. My apologies for the dark photos. Here's a closer look:


The fox is from Lawn Fawn: Into the Woods. I used Tim Holtz Stencil: Dot Fade for the background. Then I used some Heidi Swapp Shine Ink (navy, white, & gold) for the random droplets. You can't see the white droplets on the photo, but it really brings a shimmer in the light. 

I have the deer and chipmunk cut and colored as well. I think I might use them just like this fox. Happy crafting! 

Saturday, September 26, 2015

tags after tags

I've been MIA because school is totally taking over all my craft time! However, it's not a super bad thing, I do enjoy working with the kids. I guess for now, crafting will be slowed down to weekends only.

Even though I can't make much, I can still browse other crafty sites and blogs. I'm joining Simon Says Stamp Monday Challenge: Use a Stamp and Blog Hop and their Wednesday Challenge: No Designer Paper.

I'm working on a list of things for the holiday shows coming up. From that list, I've only touched "holiday tags." I'm totally not ready, my inventory is w-a-y low. Here's the past two weeks' results:


I used my new PTI stamps! I was so excited when they came in the mail. I really like the little bear stamp! :) Then I packaged them nicely, twelve tags per container, three of each design:


Here are the other tags that were done:


I've gotta mass produce and make other designs as well. Hopefully school gets in to routine within this week and crafting is on schedule again. Or else I'll be in big trouble when the shows are here!

Thursday, September 10, 2015

STAMPteber with SSS

School just started and it has been crazy trying to my classroom together last minute. I was called in last minute and trying to do everything in order to keep organized and calm. Not much time to craft, but I did manage to browse crafty things online!

The STAMPtember release from SSS is so cute this year! I was amazed! Normally I would like just a few things, but this time I like a lot of it. Can't wait to get my order in the mail.

With the little time I had, I did manage for this:


My sister is a pianist and had a bunch of vintage music sheets for my crafty needs. Yes, these were actual music sheets that people had used in the past. I tried to cut around the areas that had pen/pencil marks. 


I'm still working on this ombre inking; I'll get better at it over time. As for the sentiment, "feel better soon," I stamped it with some versamark and ran some Perfect Pearls over it. 

I used this card and entered in both of their challenges:
Blog hopping has been fun this week. If I don't get to craft, at least I can see what other people are doing. I'm kinda getting inspired to craft and scrapbook, but got no time for now! Ahhh... my crafty fingers are tingling. Hopefully the school year will settle down soon.

Sunday, August 23, 2015

Last Summer Birthday For Now

This is the last birthday card I'm making for the summer. I can't believe fall is just around the corner!

Papertrey Ink is one of my favorite stamp company! And following their Make-It-Monday blog, I did the technique Ashley had mentioned, "Masking Sentiments." I made this card following the technique (Make-It-Monday #221):


I used the same design and technique for both cards. Except one is for a birthday and the other is for a thank you card. The color scheme I chose was on purpose to match Simon Says Stamps: Monday Challenge: Citrus with a Twist. Here's another look:


I totally messed up on the birthday card... it was really hard to match the stamps up correctly. :( Oops...

Friday, August 21, 2015

Summer Birthday continues

My sister just moved out recently, so we are in the transition of spaces currently. Despite leaving soon again for school, my brother moved into her "old space," while I'm moving my crafty things into half of his "old room." I never had a "craft room" before, this will be first to have a designated space to work! Pictures to come soon!

Anyhow, I'm continuing onto more summer birthday cards:


This card is a fit for Simon Says Stamp Monday Challenge: Citrus with a Twist.  I promise you that the yellows are much more vibrant than what it appears in the picture. It's the same stamp set I used in a previous card/post. However, this time I left out the coordinating dies and just left it to good old stamping. Additionally, the "Happiness" sentiment is embossed. And finally a red fold trim pulls the the two panels together.

stamps: garden gild (PTI)

Monday, August 17, 2015

office supplies meets crafting


Ok, a short break from birthday cards for now... Actually, I'm posting a short tutorial! :) Just keep reading!

It's back to school season again! This means, it's time to buy office supplies for cheap. I don't know about anyone else, but sticky notes is a necessity on my desk. So I went out and bought a bunch of sticky notes.


Then, on Pinterest, I stumbled upon Nancy's blog and thought these note pads (to the right) were so cute! So I made a version of my own.

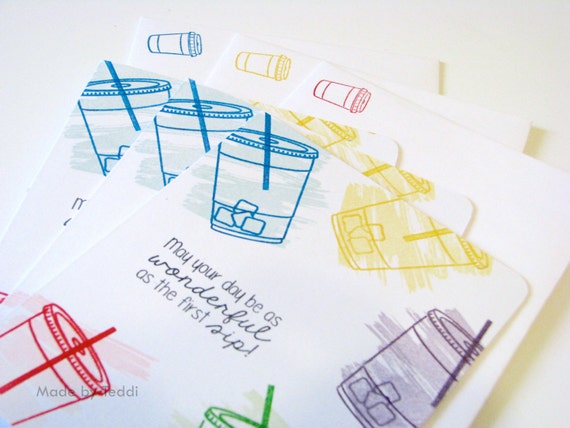
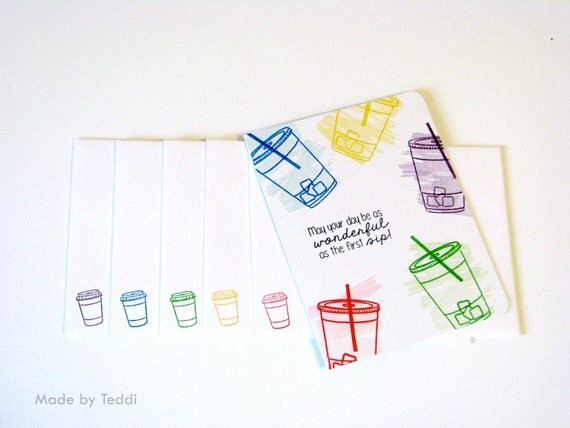
Instead of using legal paper pads, I used my new purchased sticky notes. And I made these:


I think I'll sell these at the next craft show! Notice the cupcakes on on some of them. I thought those were perfect for Simon Says Stamp: Wednesday Challenge: Food and/or Drinks. So the sticky note pads that I got were 3"x3" and about 50 sheets (thin pads). First I inked up the sides using Distress Ink. 

(This particular one that I'm showing you is perfect for Simon Says Stamps: Monday Challenge: Citrus with a Twist. I love this distress orange shade - dried marigold!) Then I took some pattern paper and cut them into 2 - 4"x4" squares. These are the covers of the note pad. Next, I cut thin chipboards to 2 - 3.25"x3.25" squares and 1 - 0.5"x3.25" strip. I didn't have chipboards so I used a mailer instead. It worked out great! For the inside, I cut a 3"x7" strip. Lastly, for the outside binding, I cut a 1.5"x6" strip; scoring at every 0.5" vertically.


Now that I had all my pieces, I can assemble! You can use any wet adhesive or tape. It doesn't really matter; I used both. First, the covers: I adhered the squared chipboards and pattern paper together. Then, laid them onto the outside binding. Between the covers, I laid the 0.5" strip of chipboard in the middle. Please see picture below:


To add a pop color, I used some ribbon. (This is optional, you don't have to do this.) I flipped what I had assembled so far and adhered the ribbon. 


Then I flipped it back again and folded the excess binding paper and ribbon towards the middle. More  adhesives were added along with the inside paper. At this point, I would take my bone folder and rescore the score lines from the binding piece. Except, score it from the inside. Make sure to fold along the score lines to help the papers bend properly. Now the entire cover is done; just let it dry a bit. Now it's ready for the sticky pads. I took the back of one of the pads off and stuck it right on top of the other. 


Using some Scor-Tape to the back, I added the pads onto my cover piece. And now it's done! You may choose to embellish the front as you please. I had so much, I took on a new challenge, using the same concept and made a legal note pad cover as well. (You can see all the sticky pads in this picture too!)


This legal pad can be replaceable once it is used up. I believe that many Stampin' Up demonstrators has videos and other blogs that has similar tutorials like this. I encourage you to go check them out! 

We'll be back to summer birthday soon!