Monday, December 7, 2015

It's beginning to look a lot like Christmas!

Wow, has it been soooo busy! It's December already and I have yet to do my gift list for friends and family. I'm not sure what I want to make yet. I made a TON of cards and little gift items for the craft shows; however, I don't want to give out those items... I feel like that would be cheating. I want to make something unique instead of just giving "inventory" as gifts. But on the other hand, I'm running out of creative juice here... this will be tough!

Nonetheless, I did get my self an early Christmas gift -  Furetake Fude Real Brush Pens!
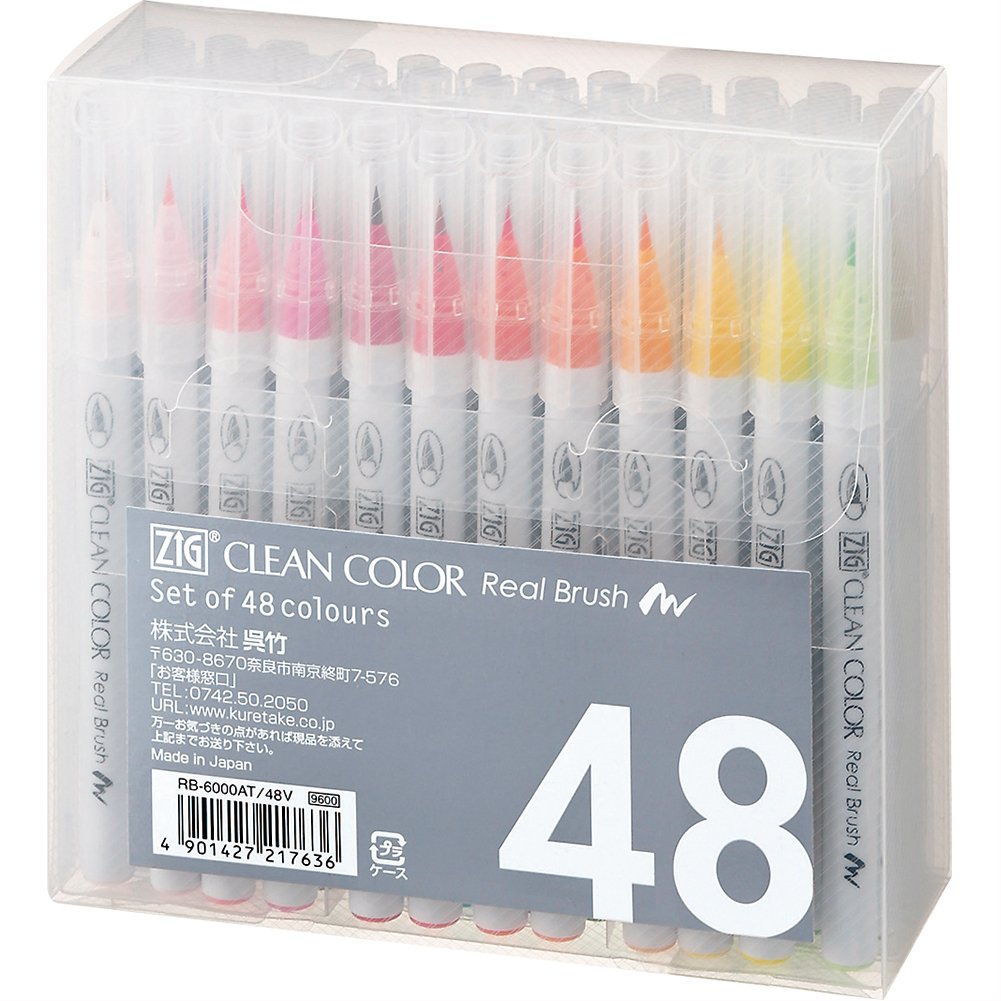
I am super excited about these! Bought them on Amazon (free shipping - thanks to my boyfriend's Prime ;)) I've been watching videos and reading blogs from other crafters about watercoloring. Ashley got these over the summer and I played with them. I can't wait to put my new colors into action. 

The next item I'm also super excited about is the Hero Arts Milwaukee Heat Gun!
I wasn't intending to get this, even though I need a new heating tool for some time now. I have a cheap one that takes a while to heat up and it's starting to tarn/rust around the metal tip. Anyhow, my boyfriend recently asked me what I wanted for Christmas. Although there wasn't really anything specific that I wanted, I asked for this heat gun. I didn't think he would get it, but he did! He got it from Ellen Huston

There are a few new stamps I want to add to my stamping wish list:

1) Luna Animals from Mama Elephant 
  
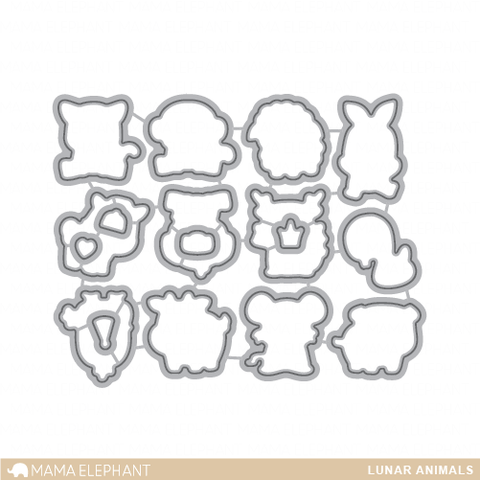
These are so adorable! I've bought the Luna Extra set and Lucky Envelope die from Mama Elephant already. I'm looking forward to making my own 紅包 (red envelope) for Chinese New Year. Then, i saw Vera's red envelope with the critters; now I really want to get these critters too!

2) Oriental Orchid from Altenew
 
I love orchids! I started caring for two orchids this year. They were neglected and left to die, so I took them in. I have never had orchids before; this was quite the learning experience. The good news is, they're both growing strong and new roots/buds are coming in! I saw so excited to see these new stamps from Altenew. I'm not Korean, but I really like it when I can find good quality stamps in different languages, especially an Asian or sand-scripts languages. These stamps are definitely on my wish list! 

3) Autumn Foliage from The Ton
 
I think these are absolutely gorgeous and stunning. The layering ink really brings out the details of each leaf. These leaves can be used for any occasions and various flower stamps from different stamp companies. I think these would make great accents or background for any type of floral pattern. 

That's all for now. I'll keep you posted on the next three items on my stamping wish list on my next post!


Monday, November 16, 2015

Almost Advent

Wow, this past month has gone by way too fast! I've been busy with craft shows on weekends and school stuff during the week. There's no time to do anything else! (or so it seems...)

Being at craft shows and seeing other crafters doing holiday stuff has really inspired me to make an advent calendar. I've never used one before, let alone make one! Nonetheless, I thought this would be a good project on the side. And TA-DA:


 It's a 6"x6" cube; made with 24 matchboxes. Each drawer slide out for each day before Christmas. And, for Christmas day, there is an extra big box on the top for more goodies on that very day! Here's the "back" side:


Technically, there is no "front" or "back." This calendar will need to be rotated as the days go by. Here's what it looks like with the drawers pulled out and the top opened. Each matchbox is the same size; they are all a little over 3" deep.

If I'm up for it, maybe I'll make another one to sell at the craft show! :)

Tuesday, October 27, 2015

First show of the season!

I've been MIA due to teaching and prepping for my first show of the season.  The show was small and local, but I'm was so nervous yet excited. Plus, the weather was not helping. The event was suppose to be outdoors, but it was raining and pouring at the beginning. I didn't know what to expect, especially it's so early in the season. Here's my set up:


My booth was against the wall (not ideal, but oh well). One side was all card stuff and the other are various paper crafts. 


The event turned out well. Better than I had hoped! Can't wait for the next show in a few weeks! I'm intending to post more of my crafts and shows in the near future. 

Saturday, October 3, 2015

Spotlight Surprise!

Happy World Card Making Day! And what a super pleasant surprise; I'm featured in the recent Simon Says Stamp's Spotlight for my previous blog post!

As for this week, the set of notecards I made below is entered into their Wednesday Challenge: Anything Goes and their main blog: World Card Making Day.

I stamped, die cut, and colored all these little cute foxes a while ago. It's time for me to put them to good use. I decided to make sets of notecards. They turned out so cute! I can't wait to use them and send them to people.


The weather is kinda gloomy here in Michigan, so my room is very dark. My apologies for the dark photos. Here's a closer look:


The fox is from Lawn Fawn: Into the Woods. I used Tim Holtz Stencil: Dot Fade for the background. Then I used some Heidi Swapp Shine Ink (navy, white, & gold) for the random droplets. You can't see the white droplets on the photo, but it really brings a shimmer in the light. 

I have the deer and chipmunk cut and colored as well. I think I might use them just like this fox. Happy crafting! 

Saturday, September 26, 2015

tags after tags

I've been MIA because school is totally taking over all my craft time! However, it's not a super bad thing, I do enjoy working with the kids. I guess for now, crafting will be slowed down to weekends only.

Even though I can't make much, I can still browse other crafty sites and blogs. I'm joining Simon Says Stamp Monday Challenge: Use a Stamp and Blog Hop and their Wednesday Challenge: No Designer Paper.

I'm working on a list of things for the holiday shows coming up. From that list, I've only touched "holiday tags." I'm totally not ready, my inventory is w-a-y low. Here's the past two weeks' results:


I used my new PTI stamps! I was so excited when they came in the mail. I really like the little bear stamp! :) Then I packaged them nicely, twelve tags per container, three of each design:


Here are the other tags that were done:


I've gotta mass produce and make other designs as well. Hopefully school gets in to routine within this week and crafting is on schedule again. Or else I'll be in big trouble when the shows are here!

Thursday, September 10, 2015

STAMPteber with SSS

School just started and it has been crazy trying to my classroom together last minute. I was called in last minute and trying to do everything in order to keep organized and calm. Not much time to craft, but I did manage to browse crafty things online!

The STAMPtember release from SSS is so cute this year! I was amazed! Normally I would like just a few things, but this time I like a lot of it. Can't wait to get my order in the mail.

With the little time I had, I did manage for this:


My sister is a pianist and had a bunch of vintage music sheets for my crafty needs. Yes, these were actual music sheets that people had used in the past. I tried to cut around the areas that had pen/pencil marks. 


I'm still working on this ombre inking; I'll get better at it over time. As for the sentiment, "feel better soon," I stamped it with some versamark and ran some Perfect Pearls over it. 

I used this card and entered in both of their challenges:
Blog hopping has been fun this week. If I don't get to craft, at least I can see what other people are doing. I'm kinda getting inspired to craft and scrapbook, but got no time for now! Ahhh... my crafty fingers are tingling. Hopefully the school year will settle down soon.

Tuesday, September 1, 2015

PTI Stamp-a-Faire 2015: Make It Work Challenge

If you've been following me, I've been working and playing along with:
Last up is:

"Create a new card from pieces of reject cards or alter a card from earlier today that you were not happy with."

This happens a lot... and I mean A LOT! I started the project but it never turns out the way I had imagine. For the Pattern Challenge, I started with this envision of the sketch but flipping it to a horizontal card. It was not good, had to pitch the idea. Later, I came back to the stamped background and turned it into a new card!


I also added the sentiment piece (it's actually covering up a previous sentiment I had originally stamped there). And ta-da! It works! :)

Just like the previous card, I'm also entering this into Simon Says Stamps: Wednesday Challenge - Anything Goes.

Sunday, August 30, 2015

PTI Stamp-a-Faire 2015: Thread Challenge

If you've been following me, I've been working and playing along with:
Next up is:

I have a confession to make: I tired to make these thread nests... yeah, no good. NO GOOD AT ALL! I'm really terrible at making these thread nests, soooo change of plans. I decided to use thread to hold a hanging item.


By having this hanging item, I can have the inside sentiment stamped on the back of it and leave extra room for me to write to the receiver of this card! This turned out better than I thought!


I went for a rustic look of this card: mail/postage.

PTI Stamp-a-Faire 2015: Patterns Challenge

I'm still on:

The next challenge we tackled was:

"Create a card using one of the above twelve sketches as your inspiration."  The sketch I chose was this one: 

And my result:

And the inside:


This card is fun and festive! Good for any age and gender! I can't wait to send it out!

PTI Stamp-a-Faire 2015: Bridal Challenge

I just spent the past 24 hours with Ashley, inside her craft room, working on PTI Stamp-a-Faire challenges. 

However, I have not completed them all nor will I finish them all. PTI's deadline is by this coming Tuesday. The next few blog post will totally be all about these projects. All these projects are based on a fashion theme. 

It was 8:00 am, my brain was slowly waking up to this first challenge:
"Create your own wedding project utilizing nothing but the color white." This was a tough one to start the day! Initially, I thought, "I can't stamp white-on-white!" Rough start... but thankfully, Ashley just picked out a random wedding stamp set and said, "Here, use this," and got the ball rolling. This was the result:


The two cards are similar in design, but the embossed background and layout of the leaves are different. The is a shimmer on the leaves; I sprayed the shimmery alcohol concoction from Ashley (I believe it's from Stampin' Up). I think these cards are also an excellent choice for Simon Says Stamps Wednesday Challenge: Anything Goes


I love the gold embossing for the sentiment. The combination of white and gold give these cards a very elegant style.

Wednesday, August 26, 2015

Sparkle & Christmas

I was blog hopping and came to Happy Little Stamper August Christmas Challenge page. Their theme this month is "SPARKLE." How perfect~ I just reorganized all my paper supplies and knew exactly where all my sparkly, shinny papers were! And this was the result:


Christmas seems so far, yet so close! I'm looking at the calendar, and it seems like holiday craft shows are starting soon! This card is also good for Simon Says Stamp Wednesday Challenge: Anything Goes


I used PTI's Wonderful Words: Holiday Die for the "merry" and added "Christmas" from a different stamp set. I used the same die cut, "merry," on red glitter paper and some fun foam. This way, I was able to give the text some dimension. For more sparkle, I added some more sequin for bling. 


Side note: My Etsy store is coming along. I'm still working out the details and organization. Will do some posting about that soon. Thanks for stopping by!

Sunday, August 23, 2015

Last Summer Birthday For Now

This is the last birthday card I'm making for the summer. I can't believe fall is just around the corner!

Papertrey Ink is one of my favorite stamp company! And following their Make-It-Monday blog, I did the technique Ashley had mentioned, "Masking Sentiments." I made this card following the technique (Make-It-Monday #221):


I used the same design and technique for both cards. Except one is for a birthday and the other is for a thank you card. The color scheme I chose was on purpose to match Simon Says Stamps: Monday Challenge: Citrus with a Twist. Here's another look:


I totally messed up on the birthday card... it was really hard to match the stamps up correctly. :( Oops...

Friday, August 21, 2015

Summer Birthday continues

My sister just moved out recently, so we are in the transition of spaces currently. Despite leaving soon again for school, my brother moved into her "old space," while I'm moving my crafty things into half of his "old room." I never had a "craft room" before, this will be first to have a designated space to work! Pictures to come soon!

Anyhow, I'm continuing onto more summer birthday cards:


This card is a fit for Simon Says Stamp Monday Challenge: Citrus with a Twist.  I promise you that the yellows are much more vibrant than what it appears in the picture. It's the same stamp set I used in a previous card/post. However, this time I left out the coordinating dies and just left it to good old stamping. Additionally, the "Happiness" sentiment is embossed. And finally a red fold trim pulls the the two panels together.

stamps: garden gild (PTI)

Monday, August 17, 2015

office supplies meets crafting


Ok, a short break from birthday cards for now... Actually, I'm posting a short tutorial! :) Just keep reading!

It's back to school season again! This means, it's time to buy office supplies for cheap. I don't know about anyone else, but sticky notes is a necessity on my desk. So I went out and bought a bunch of sticky notes.


Then, on Pinterest, I stumbled upon Nancy's blog and thought these note pads (to the right) were so cute! So I made a version of my own.

Instead of using legal paper pads, I used my new purchased sticky notes. And I made these:


I think I'll sell these at the next craft show! Notice the cupcakes on on some of them. I thought those were perfect for Simon Says Stamp: Wednesday Challenge: Food and/or Drinks. So the sticky note pads that I got were 3"x3" and about 50 sheets (thin pads). First I inked up the sides using Distress Ink. 

(This particular one that I'm showing you is perfect for Simon Says Stamps: Monday Challenge: Citrus with a Twist. I love this distress orange shade - dried marigold!) Then I took some pattern paper and cut them into 2 - 4"x4" squares. These are the covers of the note pad. Next, I cut thin chipboards to 2 - 3.25"x3.25" squares and 1 - 0.5"x3.25" strip. I didn't have chipboards so I used a mailer instead. It worked out great! For the inside, I cut a 3"x7" strip. Lastly, for the outside binding, I cut a 1.5"x6" strip; scoring at every 0.5" vertically.


Now that I had all my pieces, I can assemble! You can use any wet adhesive or tape. It doesn't really matter; I used both. First, the covers: I adhered the squared chipboards and pattern paper together. Then, laid them onto the outside binding. Between the covers, I laid the 0.5" strip of chipboard in the middle. Please see picture below:


To add a pop color, I used some ribbon. (This is optional, you don't have to do this.) I flipped what I had assembled so far and adhered the ribbon. 


Then I flipped it back again and folded the excess binding paper and ribbon towards the middle. More  adhesives were added along with the inside paper. At this point, I would take my bone folder and rescore the score lines from the binding piece. Except, score it from the inside. Make sure to fold along the score lines to help the papers bend properly. Now the entire cover is done; just let it dry a bit. Now it's ready for the sticky pads. I took the back of one of the pads off and stuck it right on top of the other. 


Using some Scor-Tape to the back, I added the pads onto my cover piece. And now it's done! You may choose to embellish the front as you please. I had so much, I took on a new challenge, using the same concept and made a legal note pad cover as well. (You can see all the sticky pads in this picture too!)


This legal pad can be replaceable once it is used up. I believe that many Stampin' Up demonstrators has videos and other blogs that has similar tutorials like this. I encourage you to go check them out! 

We'll be back to summer birthday soon!